Showing posts with label Craft Time. Show all posts

Craft Time / Bell Wreath Ornament


It doesn't matter if it's Christmas in July or if it's December because anytime is a good time to enjoy making Holiday ornaments.
.............................................................★☆★............................................................

It's nothing but Wire, Bells and a Bow!!!

It's Craft Time! Friends these are so easy to make. It's nothing but wire, bells and a bow!!! It's just a simple circle of wire that you thread the bells on until the circle is full. Once the circle is full you just twist the end to lock it in place. Make a loop with the remaining end of wire so you can hang it on the Christmas Tree. Add the bow at the top then you're done! They are so fast to make and a real homemade beauty!

Now look at the bell wreath in the photo

You can see that the colors of bells used are all gold silver and white. You can toss copper color in there too if you like. Some are shiny and some are glittery. This color combination is striking on a tree that has white lights. So sooo very pretty.

You can always use red bells for red wreath ornaments and green bells for green wreath ornaments but if you're looking for that sparkle and flair look go for the silver and gold ones. It's just beautiful, really beautiful. And you can make these any size you want because you can buy craft bells in any size you want. But for little ornaments the small bells work just fine.

🛒craft bells / https://amzn.to/3uogMhj

There's a tiny little bow at the top of the wreath that helps to hide where you twist the wire off. There's also a 3 cluster of smaller bells at the top to balance it all out and a few gold leaves. That's it!! I love the sound of bells, don't you? Now go make a dozen or so of them and see how pretty they are on your tree.

.............................................................★☆★............................................................

My Closing Thoughts~

  • 📅 Don't forget about Christmas in July.
  • 🎁 Gift Giving: Get started now and make a dozen as a special keepsake Christmas gift. Metal bells and wire will last a lifetime and would be perfect for keeping long term. It's not made of paper or plastic like many ornaments are so this gift would be well worth making and giving / keep this in mind.
  • 🛒 Shop craft bells / https://amzn.to/3uogMhj
  • 😉 I hope you like bells too.  "Live everyday like a Holiday" Pam

............................................................★☆★............................................................

Craft Time / DIY recipe / Have you ever made your own bath bombs?


My Experience with Making Bath Bombs~

I have forever loved bath bombs and I have always enjoyed making my own when I had the time. In years past I made them because it was fun, and because I loved relaxing in a bath. Not to mention I was always obsessed with having soft skin so I never missed out on something that would make my skin soft. But now-ah-days I have found that I need them more than ever because I'm older and my muscles and my all-around body just aches. So more than ever I've been drawn to making my own bath bombs once again to help sooth my body and relax myself from a hard day. If you're into easy self-care I think you will enjoy this post.

Definition of a Bath Bomb

A bath bomb, one form of bath fizzy, is a bolus which, when placed in bath water, dissolves partly or completely and effervesces, also in some cases adding scent, color, and/or other properties or materials to the water.

Today I wanted to share one of my bath bomb recipes 

for those who would like to also make your own. It's an easy DIY and takes no time at all to do. Now since I have an herb garden, I am drawn to adding herbs in my bombs because I like the healing aspects of herbs, but it is not necessary to do if you don't want to. All bath bomb recipes can be adjusted. Also, I don't put color changing chemicals in my bombs. If the water turns pink, yellow or blue it's because of an herb or flower blossoms that I added to the recipe. Also... I am an essential oil lover, so I have it in the house at all times. I add a few drops of the real thing but it's not necessary either. Now I am talking about real essential oil and not fragrance oils. Fragrance oils are manufactured synthetically, and I don't want that. Read my recipe below 🠟 and then I'll give you some more tips.

Here's an easy recipe for you~

  • 1 cup Baking Soda
  • 1/2 cup Cornstarch
  • 1/2 cup Citric Acid
  • 1/2 cup Epsom Salt
  • 1 to 6 Tablespoon (something dried) herbs, petals, blossoms, orange peel etc. You adjust this to you. 
  • 10 drops Essential Oil (optional) one safe to use on the skin
  • 2 to 3 Tablespoons / your choice of these melted or carrier oils / coconut oil, almond oil, shea butter, cocoa butter / avocado oil / grapeseed oil / Jojoba oil / castor oil / palm oil / macadamia nut oil / sweet almond oil / apricot kernel oil / this is what's going to hold your bombs together.
  • 1 Tablespoon water
  • Your choice of a mold to form it.

Sooo easy! 
  1. Combine first 4 ingredients / baking soda, cornstarch, citric acid, epsom salt. Whisk together
  2. Combine the melted oil / essential oil and water in a SEPERATE bowl.
  3. Now combine the liquid "SLOWLY" to the dry ingredients as you WHISK.
  4. Let me say that again "SLOWLY" you don't want fizzing to happen.
  5. Once completely incorporated... mash time to form your bombs.
  6. It's going to look like wet sand and will mash together like wet sand. :)
  7. Press hard into your molds. (DIY - you can use plastic ice trays) 
  8. Let dry for 24 Hours! Then keep in an airtight container. You can keep for around... ummm.... 6 months. You will use them up way before that. LOL~
  9. When they are all dry... you can individually wrap them in plastic wrap or just shrink wrap them with the blow dryer if you're giving it as a gift. Thats It!!!!
  10. Use 1 per bath. Just drop in and fizzz away a bad day. 😁

Now let's talk about different essential oils~

  • Cedarwood has been used to help acne and skin issues
  • Chamomile / anti-inflammatory / skin health / rashes
  • Eucalyptus / decongestant / boost immune system
  • Frankincense / holy oil / skincare / arthritis pain
  • Lavender / stress / anxiety / fungal infection / wound healing
  • Lemongrass / arthritis pain / antibacterial /
  • Rose / anxiety / uplifting / sensual /
  • Tea Tree / anti-inflammatory / 
  • Sweet Orange / calming / frayed nerves /
  • Peppermint / Respiratory /
  • Marjoram / pain relief / 
  • And many more......

Now let's talk about Dried and Crushed Herbs, leaves, petals, & blossoms.

  • Chamomile dried / soothes sore muscles, promotes sleep, reduces muscle spasms / insect bites / relieves pain /
  • Dandelion flowers / winter blues / skin / 
  • Grated dried ginger / blood flow /
  • Lemon Balm leaves / uplifting
  • Dried Thyme / respiratory /
  • Helichrysum dried petals / pain relief
  • Honeysuckle dried flower petals / sensual
  • Hops / insomnia /
  • Jasmine dried flower petals / sensual / mood / refreshes skin / 
  • Lavendar dried flower buds / pain relief / insomnia /
  • Lime grated peel / calming
  • Rose dried petals / sensual / refresh skin / relax body /
  • Rosemary dried herb / pain relief
  • Orange blossoms / lowers blood pressure /
  • Parsley dried / heals bruises
  • Peppermint dried herb / respiratory / congestion / coughing 
  • Sage dried herb / prevents stiff sore muscles
  • Stinging Nettle / promotes circulation and heals aching joints
  • Valerian / calming /
  • White Willow Bark dried herb / pain relief
  • Arnica dried herb / pain relief
  • any many more....

My Closing Thoughts~

Take the time to nurture yourself. Don't forget about you. Anytime you can work on healing yourself naturally it's worth it. I know that's easier said than done because time itself is the hardest thing to come up with. But it is time we rethink how we experience life. Let's all work on ourselves and stay healthy... soul, mind & body.

Just a reminder that if you use crushed herbs in your bombs they will float around in the bath after the bomb melts out and or fizzes out. Some people love the herb and flowers floating around and some people hate it. Don't be afraid to let them go down the drain when your bath is finished. If your using crushed, you don't have to worry about it clogging the drain. Plus, it will deodorize your drain at the same time and people don't think about that. Wink~

Don't forget hot baths lower your blood pressure so watch your heat and how long you're in a soak. What you're soaking in is good for you. The healing vapors your smelling is good for you. But a bath way to hot could not be good for you especially if you already have low blood pressure. Something to think about.

I hope you enjoyed the post / "Live everyday like a Holiday" Pam
.............................................................★☆★............................................................

► 🛒 ❤ Citric Acid / https://amzn.to/3bKZHYp
► 🛒 ❤ Epsom Salt / https://amzn.to/3bF9sY3
► 🛒 ❤ Bath Bomb Molds / https://amzn.to/3P1pnPv
► 🛒 ❤ Silicone Molds / https://amzn.to/3nDZSHB
► 🛒 ❤ Bath Bomb Making Kits / https://amzn.to/3upSLqm
► 🛒 ❤ Bath Bomb Making Supplies / https://amzn.to/3Ie04ae
► 🛒 ❤ Essential Oils safe for the skin / https://amzn.to/3yJoVzs
.......................................................★☆★......................................................

Craft Time! Let's have some fun with Rock People Wall Art


 Ok be truthful.... how many of you have already tried making rock people crafts?


I LOVE this Idea!

When I noticed "rock crafting" was moving through the crafty population I had to join in the fun too. I made my way to a local garden center and picked up a bag of black river rock so I could be crafty with rocks too. You can buy river rock in gray or white or brown tones or tan or reds or black. I wanted black. You can also paint the whole rock if you want but I left mine black because I wanted it to look natural to give it a cleaner, classy look. Ha!  (🛒 rock crafts / https://amzn.to/3P1gdBX)

Rock People for Wall Art

Now this is an easy craft for kids for sure but what I liked about rock people crafts was how adults were making framed rock people for wall art. When it's framed and put somewhere like the bathroom, the mudroom, the washroom, the laundry room or a pool house room or on the porch wall.... etc. . . it just seems to fit perfectly. Wink~ I have to say it was a lot of fun putting simple personality to a rock and making them come alive. Who would of thought a rock could be so entertaining. I smile every time I look at them.

My Closing Thoughts~

  • I just wanted to share a fun craft idea for you guys so you could get your creative juices flowing. lol~ It's so easy to do! And it's fun for every age. And the best part is... this doesn't cost very much to make.
  • Here's an idea... let a rock represent every person in the family. If its 6 people in the family then glue on 6 rocks to represent everyone. Girls, boys, man, woman, dog, cat etc.
  • I encourage everyone to remember what it's like to have simple fun at home. Why not make it a family craft day. Have fun laughing!
📅 International Rock Day is celebrated every July 13th.

I hope this made you smile too.  "Live everyday like a Holiday" Pam

.............................................................★☆★............................................................

► 🛒 ❤ Rock Crafts / https://amzn.to/3nO8qMq

.............................................................★☆★............................................................

Craft Time . Large wooden painted deer


 Oh My Gosh! These are some big deer!

I painted them with acrylic paint and the first 2 deer I painted were really fun to paint . . . but then it wasn't fun anymore. LOL~ I put way to much detail in the painting for something that goes outside. It was taking me forever to finish the painting of them too. Not to mention the fact that they were LARGE deer. What was I thinking?!

On this one I held back on some of the detail but then decided that I could'nt leave it like that. It just called out to me to "Dooo Moreeee".  I was going to just put a tiny bit of black hair below the antlers but I ended up fluffing it all up nice and pretty on the final brush.

This deer is sitting here drying. 

Yep I needed this coat of paint to dry before I did the next coat. Now normally I like to wet paint, wet paint, wet paint LOL but I needed some dry time so I didn't smear it since the deer was so big. Plus I wanted a shadow / layer effect that I can only get when I paint on top of dry paint.

I did all the deer different

The white, black, gray and light blue deer were gorgous!! They were like white snow deer. I painted them looking very fluffy looking and very winter looking. I thought I took pictures but I couldn't find them to post.

Made with Plywood

These deer were heavy.  The wood used was thick plywood. I put 3 coats of sealer on them too. I will not be painting anymore of them with this much detail for the outside again.

That's my "Craft Time Share Time" for you today

I soooo love deer crafts and I hope I was able to give you some ideas of your own to craft with. I am always searching out the Internet for things to spark my creativity. I love to share and I love what you share with me too.  
Until next time, Love Pam
......................................................................................................

Craft Time / 4 foot wooden deer


 Good morning everyone. It's share time! I just wanted to show you a couple pictures of these 4 foot tall, sweet little deer. Now in this photo.... I have not finished painting the face yet. In fact you will notice the black nose is not there yet and the shading on the face is not there yet either. But I needed to lay them out on the table to dry before I could start the last part of the painting.


In this picture they are all painted and sealed

They are still not finished yet because I need to put the bow in their hair. If I make it a boy I put a basic red bow. If I make it a girl and fancy up the bow a bit more. 

They are just so cute / Basic but cute

Now these are made to go in the yard but my favorite one's are those that are made on a flat base so they can be put on a fireplace hearth, inside the house.

I like the one for the inside of the house better because you can dress them up with real material ... like if you wanted to put a scarf around the neck or a huge bow on them that weather wouldn't mess up.

Ok Friends....

That's my "Craft Time Share Time" I hope you all have lots of fun this month doing all your crafts. Don't forget to share the fun stuff you learn in life with us all. Love Pam

................................................................................................................

Crafty Time / The Country Way to Decorate with pine cones

Decorating with pine cones

Pine cones are a great FREE item that's perfect for decorating the house and porch with. You can make so many things with them and the pine smell is just awesome. I have a huge pine tree in yard that drops tons of pine cones on the ground that I can use. I have an every ending amount that I can use to make crafts with or use for decorating.

Each year I make a simple wreath for the door made with pine cones. 

If you look at the picture above, this is the standard way I like to make my wreaths. On the outside of the wreath I like to rotate full pine cones with the skinny squirrel eaten pine cones. LOL~ I think burlap material adds the best country flair to a wreath but if I'm putting it on the outside door I like to use plastic coated ribbon because of the moisture. The best thing I could ever tell anyone about wreaths outside is...... spray and seal! Spray and seal! Spray and seal! Try making a all pine cone wreath too. Thick with pine cones. It's a lot of work but it's super beautiful.

Sometimes I just fill a huge basket with pinecones

Yep sometimes I just fill a huge basket with pinecones and put them on the porch with a big colorful bow on it. It is so pretty. I really should do one for this year and take a picture and post it for everyone.

Pine Cone Ornaments

One year I put a Christmas Tree on the porch and made all pine cone ornaments for the decorations. I spray painted the pine cones which made them shiny. I also added a bow to the tops of them and put about 50 of them on the tree. I then added simple white twinkle lights on the tree. It was simple & beautiful.

Garland

Buy yourself a cheap thin green garland and tie on a bunch of pinecones to thicken it up. The focus will be the pine cones themselves but the little bit of green that will show through will accent it. Not much green will show because your using the garland limbs to tie on the cones with. It will turn out beautiful. 

The Picture Above

The picture above is actually a display I made for a craft show where I was selling wreaths. My display was about 6 white door examples that I set up for people to get ideas from. I was disappointed when I found out there was no electricity and I couldn't turn my twinkle lights. :/

That's my "Craft Time Share Time" post

❤  Writing this post has made me want to start making some pine cone crafts again. I think I will get a bucket and start picking up pine cones and get started on my Fall decorations. Enjoy all the free stuff that nature provides for us. 

Happy Crafting and Happy Holidays everyone. Love Pam


Craft Time / The Grinch and his Dog

The whole world loves the Grinch so I thought I would show you the one's I painted for the yard.

........................................

My brother Eddie cut this large set of the Grinch and his dog out of wood. I painted them with acrylic paint and sealed the wood.

It's not showing in the photo... but use your imagination for this part. LOL~ Look at the hands... see how they are shaped. Well the pattern is made to put a string of lights in his hands, then twine it in the antlers on the dogs head. ~Wink~

Just Toooo Cuteeee!

I really enjoy painting all the Holiday stuff each season. But I sure wish the price of wood wasn't so high. It has busted my bubble this year. 😧

Have a great day everyone. Love Pam

....................................................................................................................

Craft Time / Painted Country Sign / Kissin' Don't Last Cookin' Do


 Hellooooo Crafty People! I have a good one for you

This post is going to be fun! Not only is the words of this little sign funny but I have made a major mistake when I painted one of them.  I didn't even notice it until I had it all finish and ready to take a pic. I lined them up to take a picture. It was only when I looked at the photo that I saw it. LOLOLOLOL....... Looks like I'm going to have to sand all the paint off and start over. HA!

Now I'm not going to tell you what the mistake is....  

Let's make it fun so I'm just going to say for you to see if you can find the mistake yourself. I really can't believe I did that. LOL~ All my hard work waisted. ~giggle~ I didn't get to up set over this one since it was a small sign. I think my laughter in the mistake was worth having to re-paint it.

That's my "Craft Time Share Time" post

I'm a huge lover of painting little signs. I paint lots and lots and lots of them each year that say all kinds of stuff. I hope you crafters paint this fun saying on some of your crafts too. 

Humor is great / Laughter is better. Love Pam

.........................................................................................................

Part 3 / Watch me paint a wooden sign for a snowman


I hope you enjoyed watching all 3 parts / Happy Holidays everyone and Happy Crafting too! Love Pam

Part 2 / Painting Wooden Snowman Shelf Sitter that's holding a Welcome Winter sign


Part 3 / http://gonetapott.blogspot.com/2021/09/part-3-watch-me-paint-wooden-sign-for.html

Part 1 / Painting a Snowman Shelf Sitter that's holding a Welcome Sign

As promised from my earlier intro page http://gonetapott.blogspot.com/2021/09/craft-time-my-wooden-snowman-sitters.html  .... here's a copy of Part 1

Part 2 / http://gonetapott.blogspot.com/2021/09/part-2-painting-wooden-snowman-shelf.html

...................................................................................................................

I hope you enjoy watching. Love Pam

Craft Time / My Wooden Snowman sitters


 This is the time of the year that I start putting my focus on my crafts

❤  The pictures above is a row of wooden snowman sitters that me and my brother Eddie finished building. They are about a foot tall and around 2 inches wide. I painting each sign the snowman was holding a little different. Once the paint was dry... I coated them with wood glaze to seal them. They are super cute and super country. Such a great little shelf sitter.

The Snowman Arms

❤  Now this snowman is "our own pattern." Most wood projects that you find call for the arms of the snowman to be made with dowel rods or tree limbs but the bad part of that is... they always break when people pack them up from year to year. So this year we decided to try a version where we made the arms with large pipe cleaners. In fact I twisted 2 large black pipe cleaners together to shape the arms and it worked out great! Pipe cleaners are bendable wire so they wont break... hence it will be safe when packed.

What I like about the Snowman

❤  Snowmen are notorious for representing Christmas but this year I wanted to create a few snowman that could be used for Christmas and then left out for a Winter decoration too. So I decided not to put anything red or green on some of the snowmen. I painted those in black, white, gray and silver colors.

The worst part of the project

❤  The hardest part of the project was doing the wooden nose on the snowman. I didn't enjoy doing the carrot noses at all. LOL~ You have to drill a hole in the body of the snowman, then put wood blue inside the small little hole. (those of you that work with wood glue will know the drama that can occur when you trying to fill a small hole with sticky stringy glue and not touch anything else with glue. ) Ha! Clean-up sucks. 

........................................................................................................

If you want to see more of my crafty posts... 

👀  you can find them in the right hand column of the blog here titled " Craft Time". This is in the "Popular Topics" section.  As I do a craft I will put it here to share with everyone.  Maybe you can get some crafty ideas from me. ~wink

👀  If you would like to see a video of me painting these snowmen I will put the links here:

...........................................................................................................

In Closing.....

❤  I think we need to make life as fun as we can and snowmen have long been a favorite character of mine. So anytime you can incorporate something you love in your work make your work more enjoyable. Happy Crafting everyone... and Happy Holidays too. Love Pam

My January Painting Hobby


There's nothing more relaxing to me than finding myself a fun paint project. 


Painting has been a hobby of mine for as long as I can remember. So... in honor of January being National Hobby Month I thought it would be fun to share one of my latest projects I've been working on.

The picture to my left is a sweet little child's bench that my oldest brother built. Sometimes I pick out things to paint from his collection of woodworking projects and see what I can come up with. This week I felt bird-ish so I decided to paint a cute little owl theme on the back of the bench. I like to use my fingers a lot when I paint because they work just as good as a paintbrush. ha ha! Go Finger Painting! Snicker~ So I did just that with this little project too.

On the seat of the bench I painted the words "SIT WITH ME". A simple choice I know but words that I think an owl would say if he could talk. ha ha! 

Now on the legs I decided to go with the old splatter paint style. Yep I just slung paint on the legs and stood back and thought "I love to splatter paint." If you look at the picture to my left you can see how I splattered the legs. Not to heavy.... just a light splatter and it seems to go good with the rest of the bench. 

After the paint was all dry I sealed the wood with a really high shine gloss because kids can be pretty rough on things and it would help to protect the painted picture for yearssss. I think it will be a good keep sake for someone.

Owls are a favorite of mine so I had a really good time painting this. I'm also working on a butterfly bench that maybe I will share a picture of at a later time.

Ok guys.... In honor of National Hobby Month I hope everyone who reads this will leave a note in the comment section about what your hobbies are. I know there are lots of you that loves to paint just like me so let me know. 

Other hobbies of mine are:
woodworking, wood burning, ornament making, wreath makings, cooking, gardening, blogging, calligraphy writing, picture taking, pine cone crafts, nature watching, hiking, boating, swimming, bird watching, walking, camping, fish keeping, jigsaw puzzles, baking

In Closing:
Happy National Hobby Month everyone! I hope you set a side some time this month to relax and enjoy your favorite hobbies and "Live Everyday like a Holiday."
Take Care Pam


Today I Paint

I just wanted to share with you what my project has been for the last 3 days.
My brother Eddie is a woodworker and every year he builds the props for the bible school theme at church. This year he's building an airplane for the kids to sit in and get their picture taken. No it's not a real airplane. It's just a prop but he sure did a good job on it just the same. 


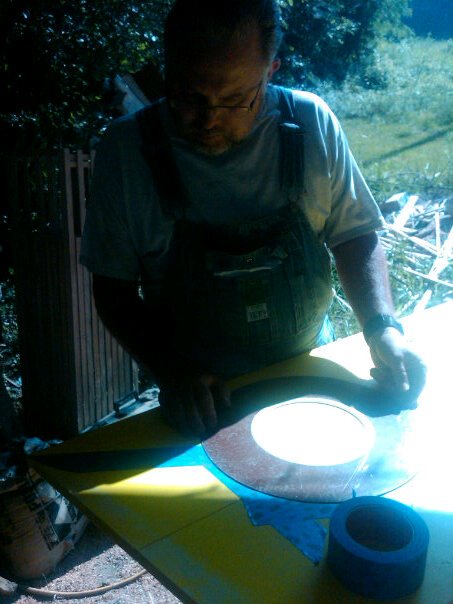
My job was to paint the black stripes: 
We wanted it to look like a bee so stripes it had to beeee. It's been so hot outside till we actually hooked up fans to blow on us while we worked. I stepped in ants once. That's what I get for painting outside barefooted. I spilt paint on my pants once and dipped my sandwich in the bucket of paint once. That's why you should never have a sandwich in one hand and a paint bucket in the other. giggle~ what can I say..........


Now most of my readers know 
I moved back into the house I was raised in. When that happened I also became my brothers neighbor. LOL! When you end up your brothers neighbor, you end up helping him on all his fun projects too. Especially when his shop is right beside you. wink~ Hey how-ah-bout that..... you can see my house in the background.


Well that's what my project was for today. 
It took him weeks to build the plane but it only took 3 days to paint it. My great nieces painted the bright yellow, my brother lined up the painters tape and I painted the black stripes. It's been a long time since I've worked on a project with my brother since I lived in another state but helping him paint reminded me how fun it was when we had a craft store many years ago.


Ceiling fan blades:
You can't see it in the photos but he used ceiling fan blades to make the propeller. giggle~ This cracked me up! He fixed it so it would spin too. How much fun it's going to be for the kids to go to bible school and see this fun prop. Great job brother!